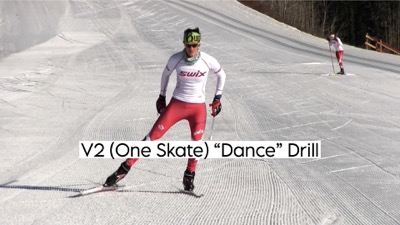
The One Skate Dance Drill
Avoid the frustration felt by so many new skate skiers with this simple and popular skate ski drill.
Affectionately known as the One Skate Dance, it is also sometimes called the Box Drill or U-Drill.
The One Skate Dance drill is a balm for new skate skiers who can’t figure out how to make their skate skis work. The pros make it look easy. What are they doing differently?
The secret to easy skate skiing on the flats has to do with how you weight and unweight your feet and how you manipulate your body position over one ski and then the other.
Follow each step in this drill methodically and patiently and you will be rewarded with an easy skate ski kick (leg push).
This drill will lay the foundation for you to master several of the skate skiing techniques, including One Skate (V2 Skate), Two Skate (V2 Alternate) and Free Skate.
One Skate (V2 Skate) Ski Technique
For expert skiers, One Skate (called V2 Skate in America) is used on the widest range of terrain and is the most versatile of all the skate techniques.
If you are just getting started in skate skiing, you’ll use this mostly on the flats. As your balance and coordination improve, you’ll be able to One Skate up and down slight hills too.
The One Skate Dance Drill is the single best drill progression I know for helping beginner skate skiers learn how to make their skate skis work.
I hope you love it as much as I do!
About this Skate Ski Drill
Beginners can use this skate ski drill for on their first day. Struggling skate skiers will also benefit from this drill.
The One Skate Dance often gives skiers a real a-ha moment because they finally feel how skate skiing might actually be easy, graceful and fun.
This is a skate ski drill where the details of your movement really matter.
Each step is simple and precisely described. Take your time, paying close attention to how you move. Shoulders and hips should stay level and not rotate. Don’t sit too far back with the hips.
The drill is done in two parts. The first part teaches the basic movement and can be done anywhere. Practice this as much as possible, even when you aren’t on skis.
The second step is done on skis, either on snow or on roller skis.
Part One (Dryland Movement Drill)
- Begin the drill standing on level ground, feet shoulder width apart.
- Flex slightly into your hips, knees and ankles. This is your new “tall” position. Do not straighten up beyond this position from now on.
- Shift your weight over to one foot. You can keep both feet on the ground to help with balance, but the great majority of your weight should be on one foot. Weight your foot evenly across all four corners of the foot.
- Flex into the supporting leg, almost like you are doing a single leg squat. Hinge into your hips and flex your knees and ankles so your entire body flexes down over that ski. Don’t sit too heavily into the hips.
- Staying low and flexed, shift your weight over to the other foot.
- Once you are fully on the new foot start to straighten up again. Remember, don’t straighten up fully. Maintain some soft flexion at the hip, knee and ankle.
- Staying on that foot, flex into the hip, knee and ankle once again. At the bottom, shift your weight over to the other foot and then extend the body up again to the “tall” position.
- The cues are DOWN-ACROSS-UP-DOWN-ACROSS-UP ETC.
Part Two (On Skis Drill)
Once you have mastered the fundamental body movement, you are ready for the on-snow portion of this skate ski drill.
- Set yourself up at the top of a slight downhill.
- Point your ski tips down the hill and use your pole tips as anchors so you don’t slip away.
- Repeat the movement you practiced in part one.
- Once you feel smooth, release the poles and let the skis run down the hill, continuing the DOWN-ACROSS-UP movement all the while gliding down the hill.
You will begin to feel the natural timing of the leg push. As you move ACROSS to the other ski, it will feel “right” to push sideways with the ski that is being unweighted.
The leg push in the sideways direction will tend to throw you off balance, so don’t push too hard. Gradually ramp up your effort and it will get easier.
Once you find it hard to get your feet back under the body, it’s time to stop, climb the slope again and start over.


